


Photo by Lisa from Pexels
Wondering why post drafts are needed?
Well, have you ever tried to post on social media and halfway through finishing your post realize something just isn’t right? We’ve all been there. Sometimes you get the most amazing ideas for social media posts, but you just don’t have all the bits and pieces together.
In a situation like this, post drafts can be a lifesaver. Post drafts allow you to save your incomplete post so that you can finish it later when you have everything you need. Most social media sites offer the draft feature these days.
Today, we’re going to show you how to use post drafts for all the major social media platforms, as well as a bonus tip that makes drafting on multiple platforms a seamless experience.
Creating Post Drafts on Facebook
There are multiple ways to draft your post on Facebook. Depending on whether you are using Facebook from your account or your page, you have to follow different steps.
On your account, you can create drafts using the mobile app. But in the case of posts from pages, you can use either Publishing Tools or Creator Studio.
Mobile App
Creating a post draft on the mobile app is very simple. Just follow these steps:
1. Open the Facebook App and log into your account.
2. Press on “What’s on your mind?” and start typing your post.
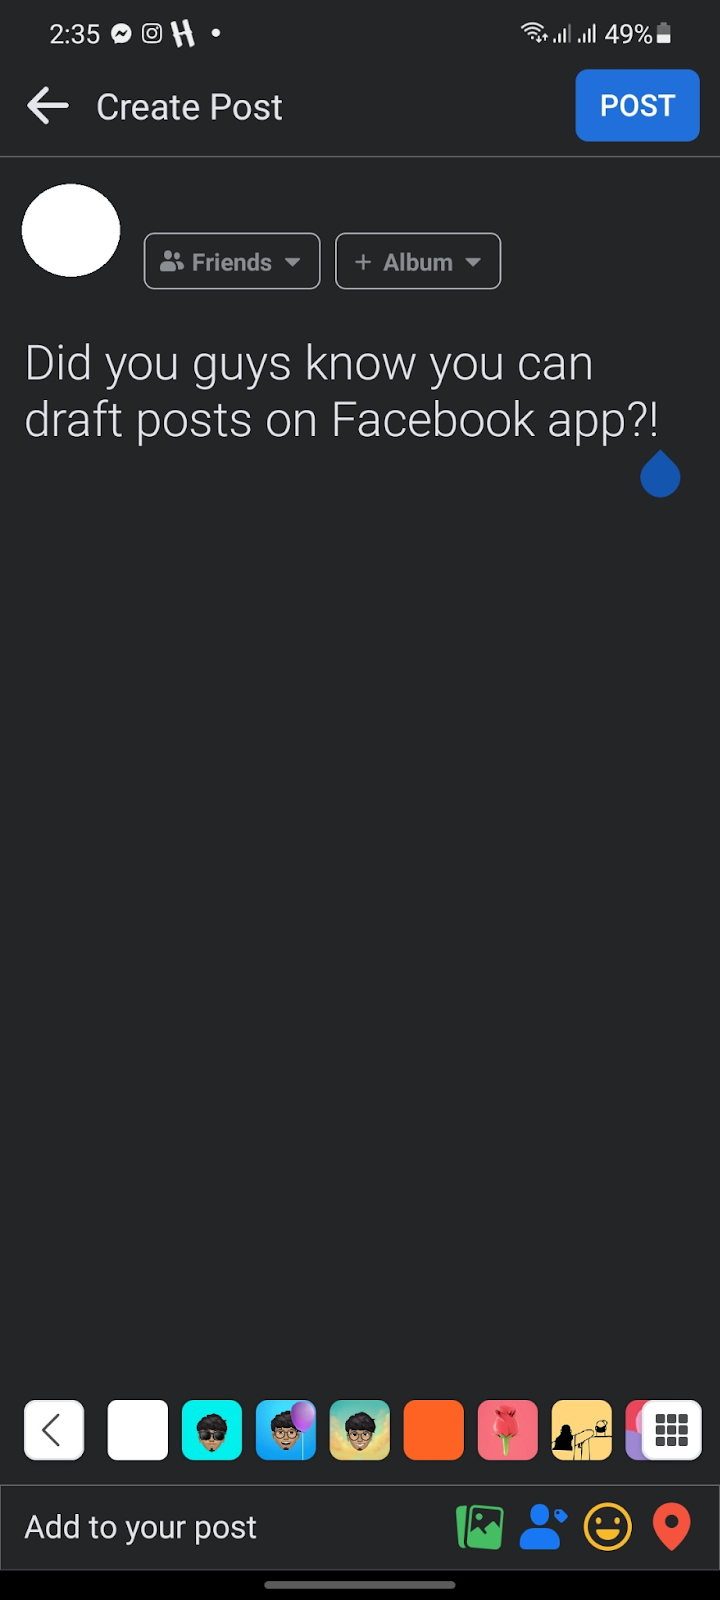
3. Press the back arrow. A window will pop up asking if you want to finish your post later.
Press on “Save as draft”.
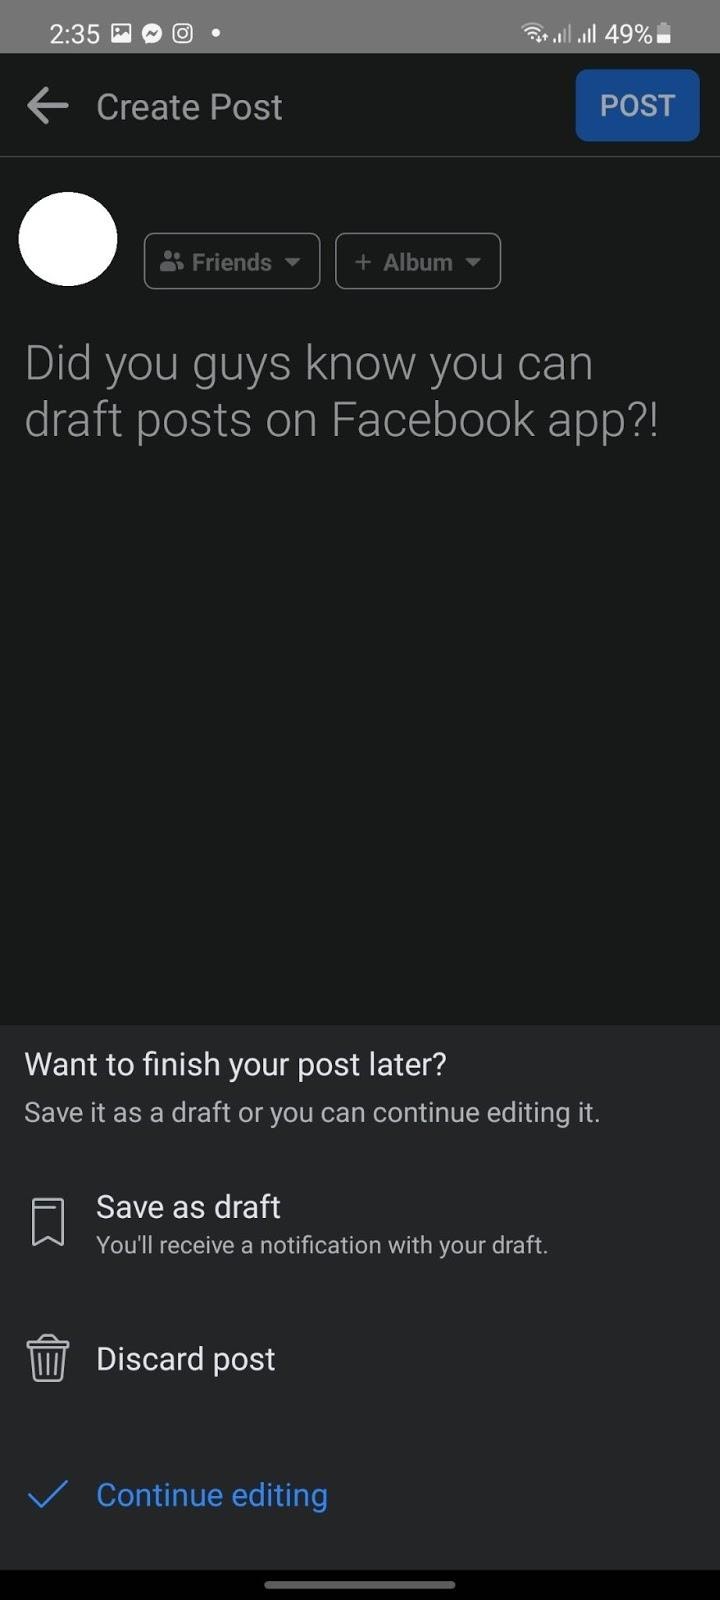
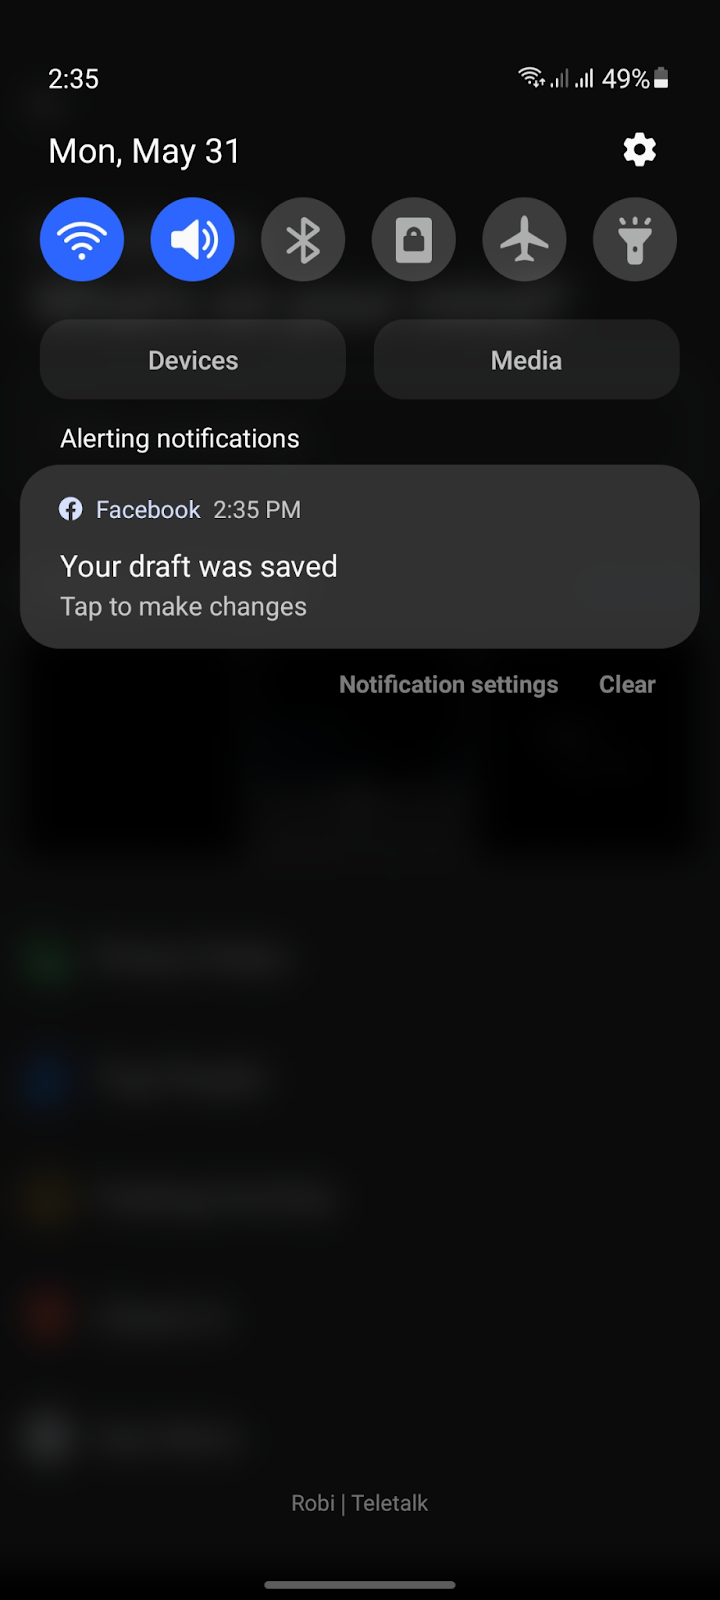
4. A notification will show up saying that your draft has been saved. You can access your drafts by simply clicking on the notification.
Publishing Tools

Publishing Tools is a page management feature baked into Facebook. You can use it to create draft posts as well. Just follow these steps:
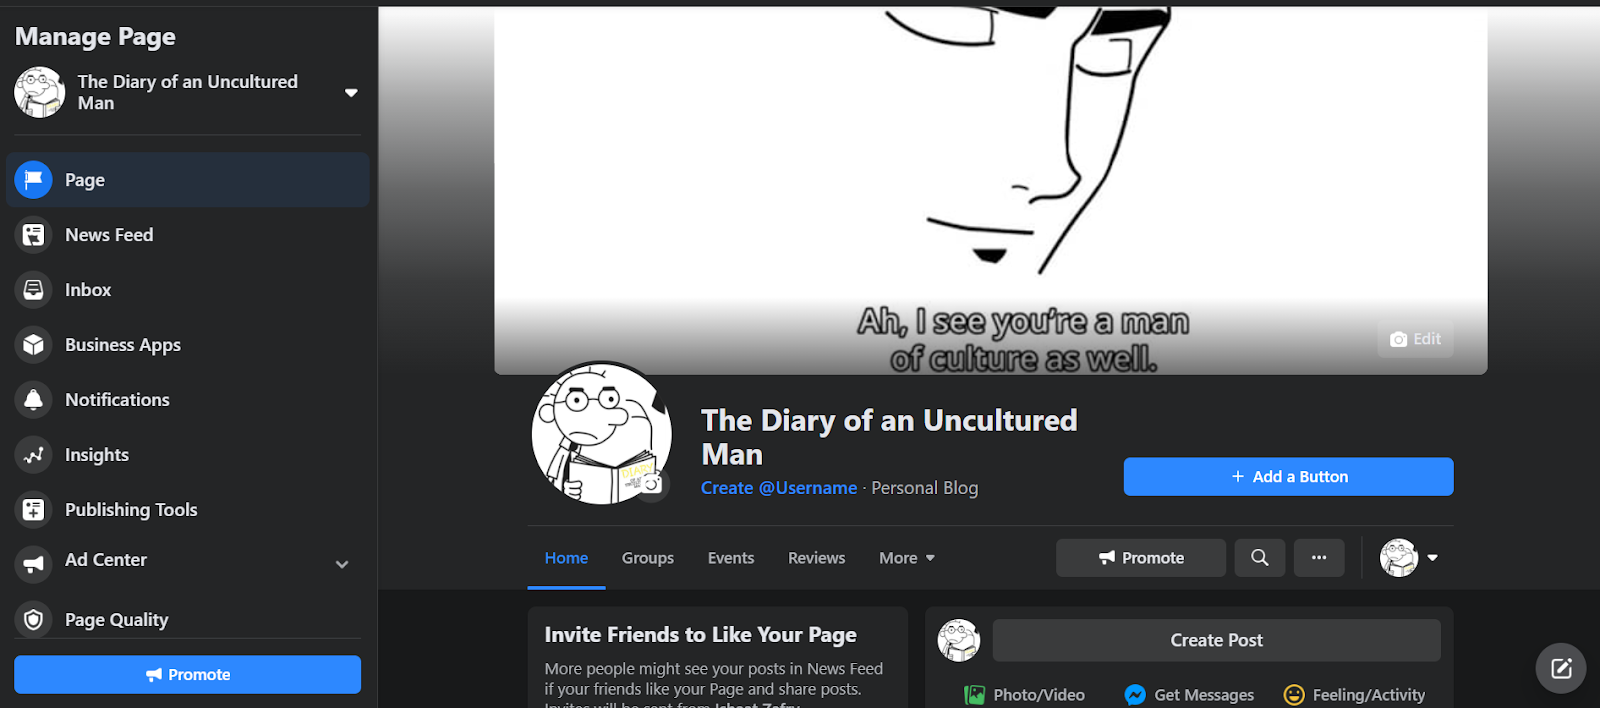
1. Log into your account.
2. Click on “Pages” from the left sidebar of your newsfeed.
3. From the list of all your pages, select the page you want to post from.
4. A sidebar titled “Manage Page” will appear. From there, click on “Publishing Tools.”
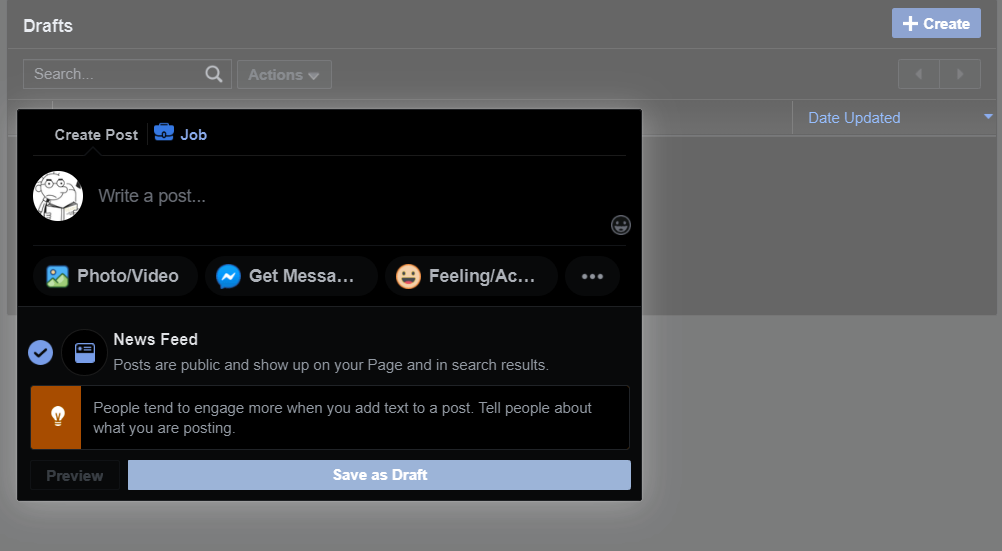
5. Under the “Posts” section on the left sidebar, you will find an option called “Drafts.” Click on it.

6. Click on “Create” and then start creating your post.
7. Click on “Save as Draft” after you are done.
Your post has now been saved for posting at a later time.
Creator Studio
Creator Studio is a feature that was introduced as a business-oriented page manager for both Facebook and Instagram. You can use it to create draft posts by following these simple steps:
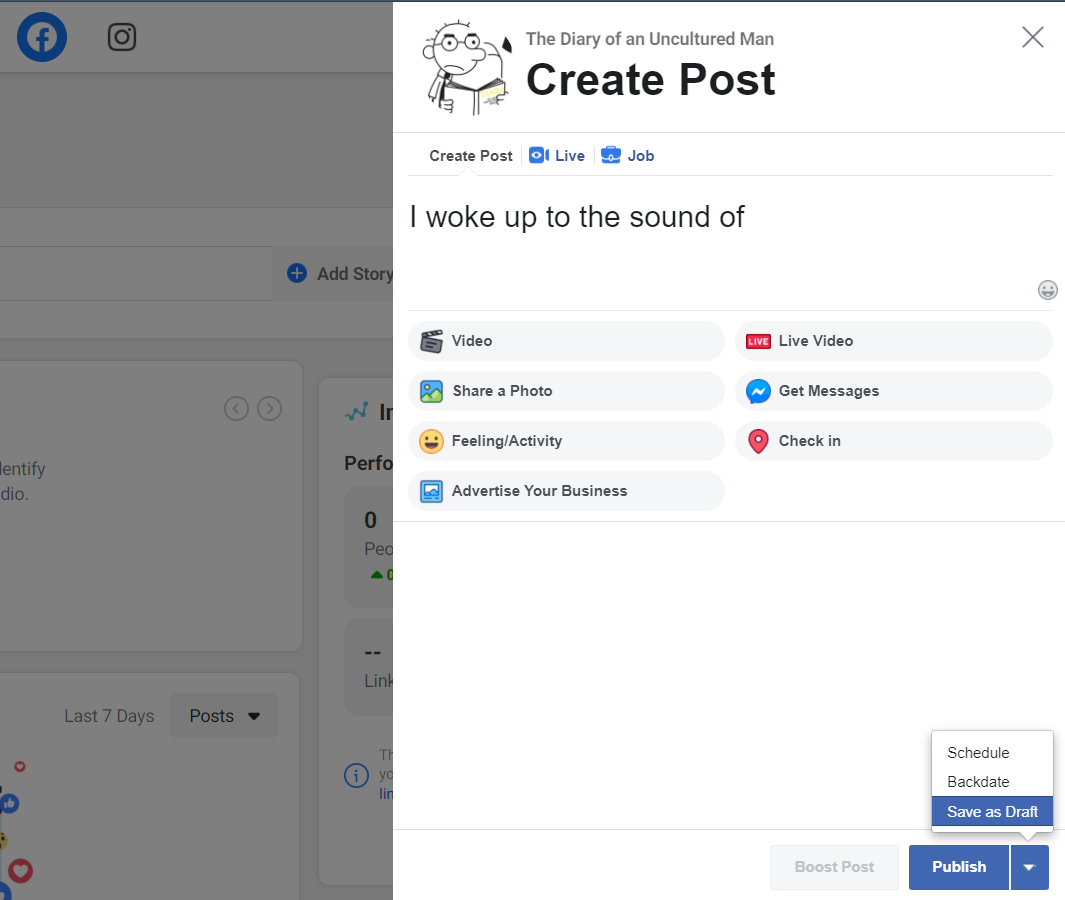
1. First, log in to Facebook Creator Studio.
2. Click on “Create New” from the sidebar.

3. From the drop-down menu, click on “Create Post.”

4. Now, create your posts with the numerous features available.
5. Click on the downward arrow beside the “Publish” button.
6. Click on “Save as draft.”
And that’s it!
Creating Post Drafts on Twitter
Twitter is one of the most engaging social media platforms out there. Thanks to its draft feature, you can easily save inspirations for tweets on the app itself. To create a draft tweet on Twitter, follow these easy steps:
1. Open the Twitter app or go to the website, and log into your account.
2. Click on the Tweet button on the bottom right of your screen. If you’re on your PC, the Tweet button will be on the left sidebar.
3. Create your tweet.

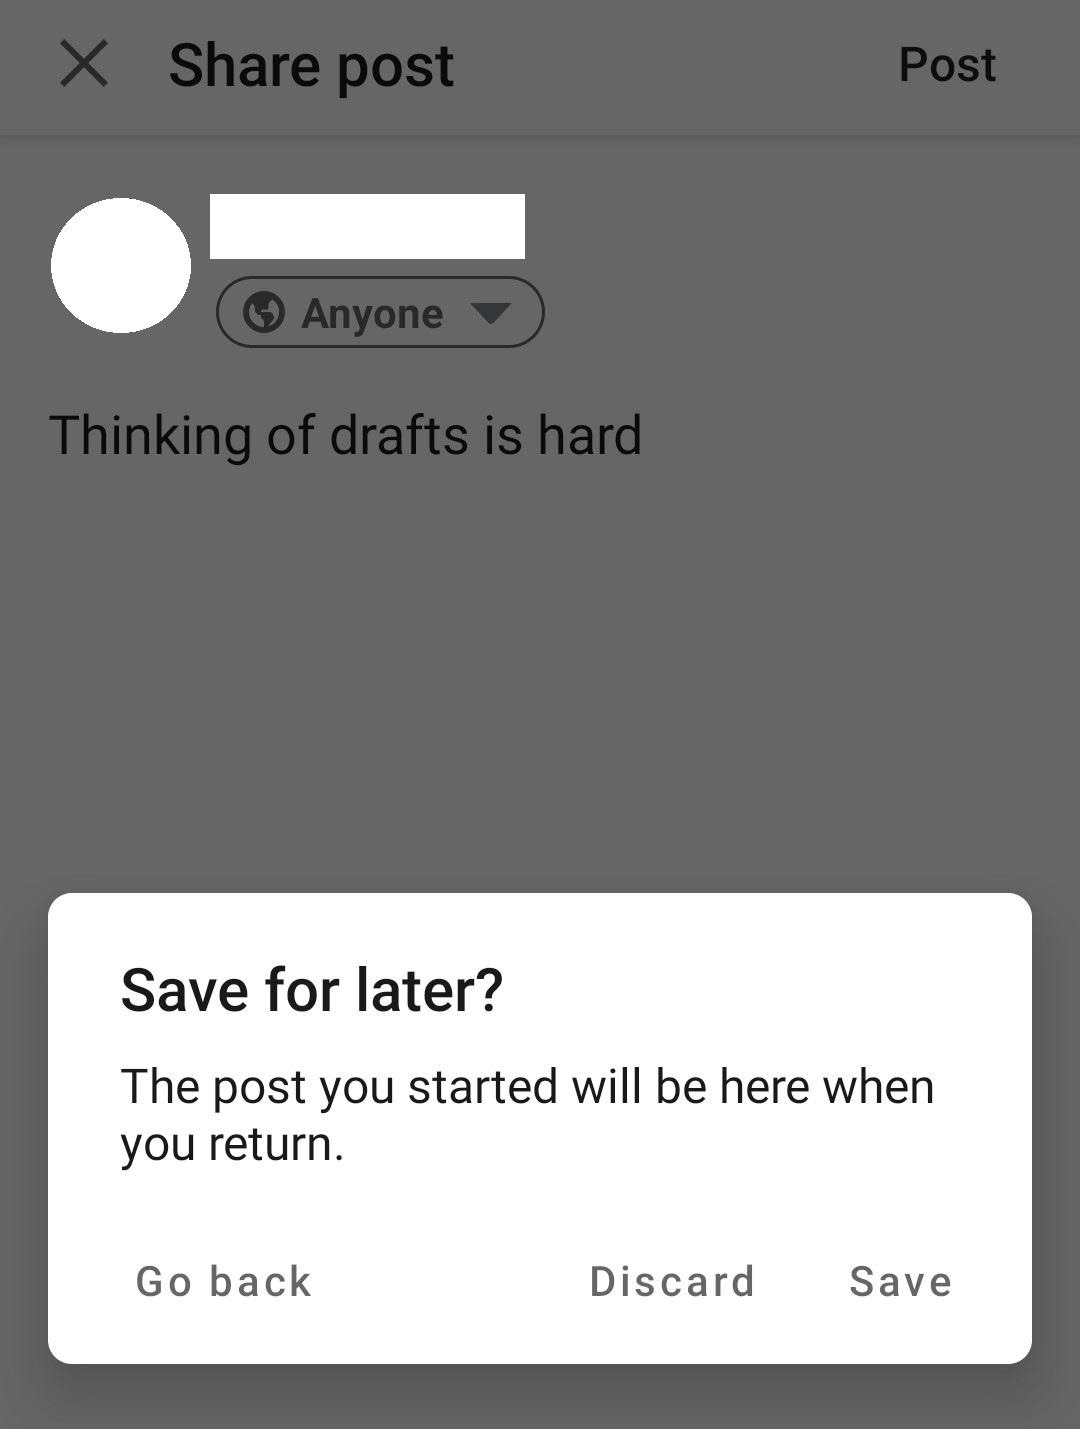
4. Press the X on the top left corner of your screen.

5. A dialogue box will pop up asking if you want to save your tweet as a draft. Click on “Save.”

6. Now, you can find your draft by pressing the Tweet button and then clicking on “Drafts” on the top right side of your screen.
Creating Post Drafts on Instagram
Many of us can relate to never being convinced that your Instagram post is ready. We always find little edits we think we can do better while creating our posts.
That is why Instagram’s draft post feature is so handy. If you have a habit of second-guessing yourself when posting on Instagram, these simple steps can make your life a whole lot easier.
1. Open the Instagram app and log in.
2. Click on the “+” icon at the bottom of your screen.

3. Select the pictures you want to post and press “>”.

4. Edit the pictures however you want. You can use any of the preset filters or even manually edit each one. After you are done, press “>”.
5. Now, you can add a caption to your post, add location, and tag other accounts. Customize it as you wish and then press “<” from the top-left corner of your screen.
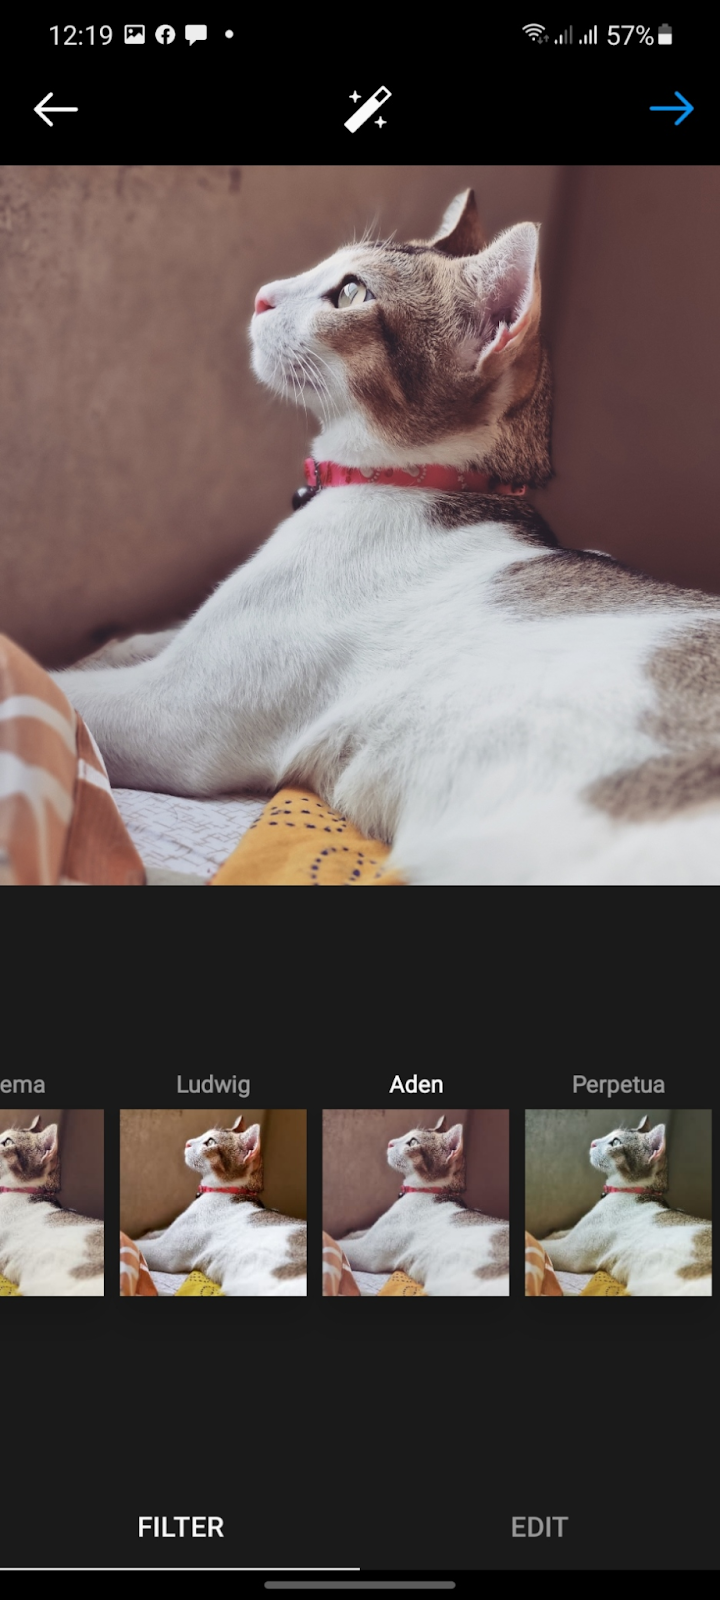
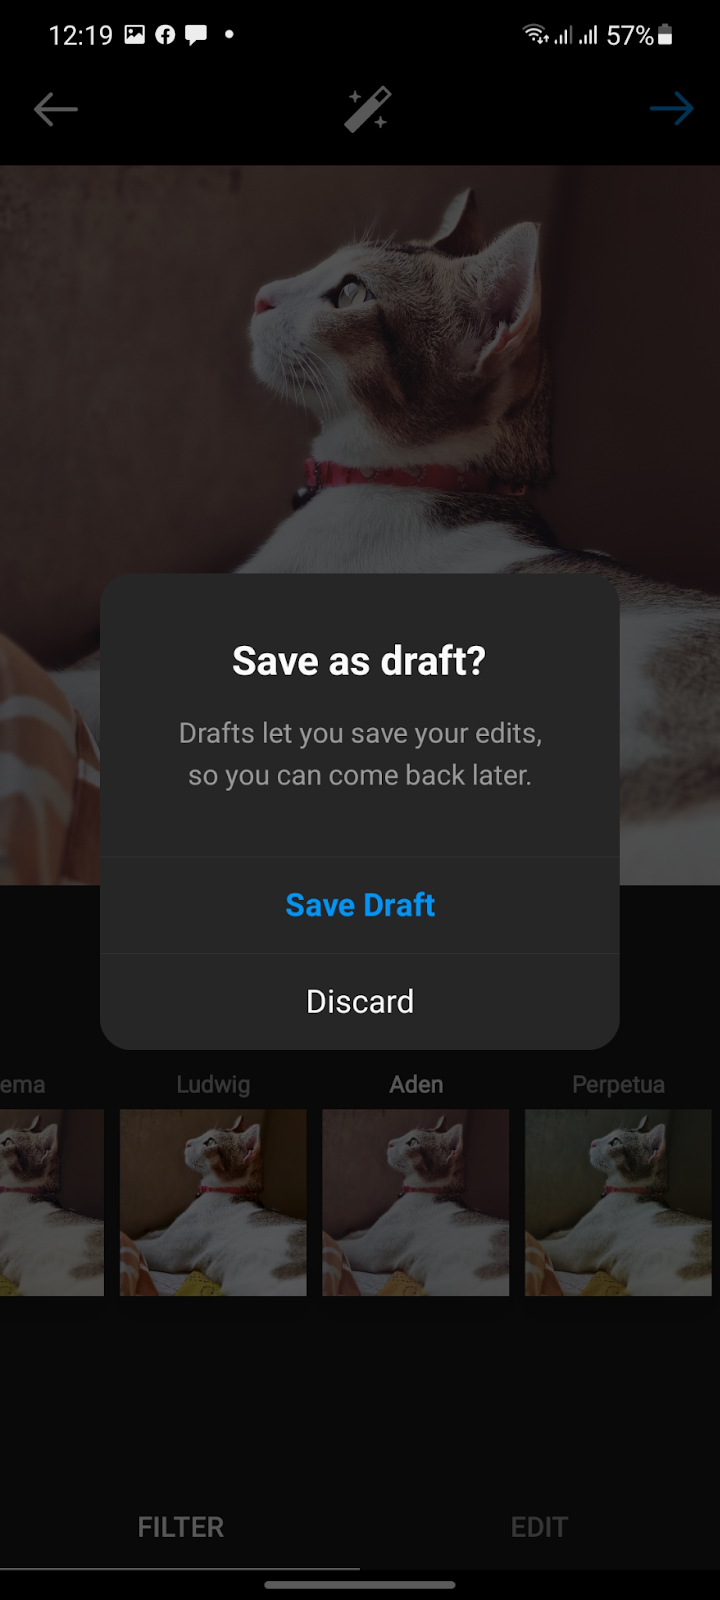
6. Press the “<” once more. A dialogue box will pop up. From that box, press on “Save Draft.”
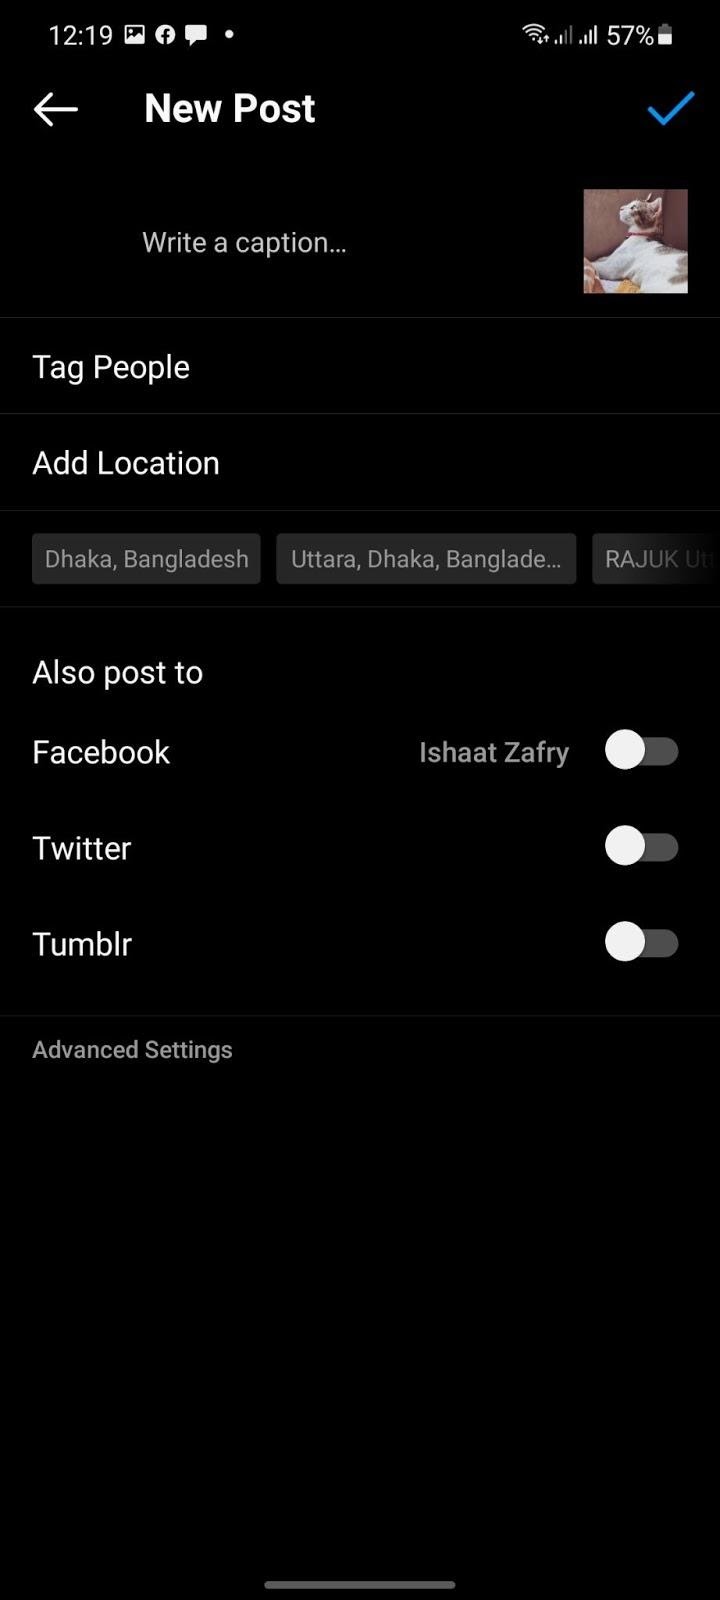
Your post has been successfully saved as a draft. You can access your drafts by pressing the “+” button. All of your drafts will be saved under a section called “Drafts.”

Creating Post Drafts on Linkedin
Linkedin is, without a doubt, the most professional social media platform out there. So it is a bit ironic that creating draft posts on Linkedin is kind of confusing.
But don’t worry because we’re here to help. On Linkedin, you can save your posts in two ways. One as a regular post on your mobile phone. Or two, as an article on your PC. Here are the steps you have to follow.
On Mobile
Linkedin allows you to save a single post as a draft when you are posting from the Linkedin app. Here’s how it works.
1. Open the Linkedin app and log in to your account.
2. Press the “+” button at the bottom of your screen.

3. Create your post.
4. Press the “X” button at the top-left corner of your screen.
5. A dialogue box will appear. Press on “Save.”
Now the post has been saved as a draft. The next time you press the “+” button, it will load up.
On PC
Linkedin lets you save articles as drafts on PC. To do this, follow these steps:
1. Go to Linkedin and log into your account.
2. Click on “Write article.” You will be redirected to the post creation page.

3. Create your article. Your post will be automatically saved as a draft.
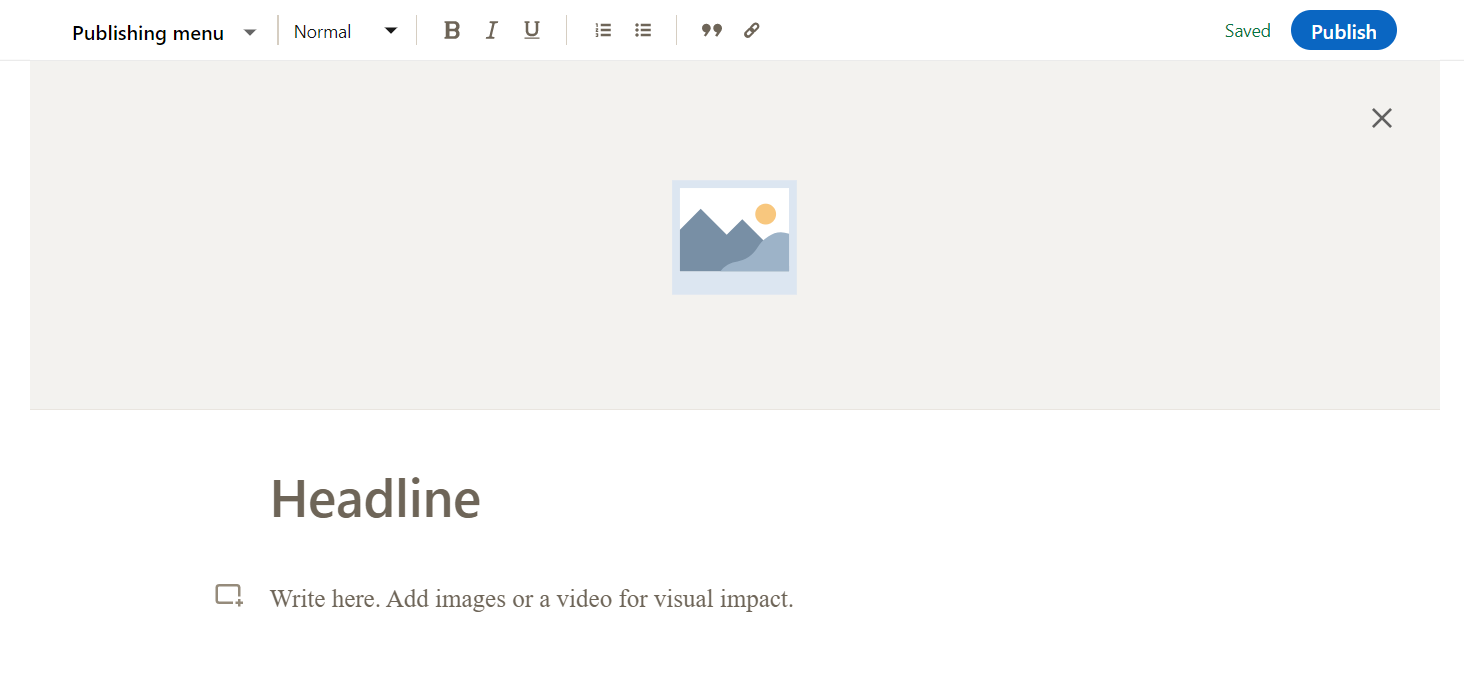
When you want to post the draft click the “Write article” button again. This time click on the drop-down arrow beside “Publishing menu” and click on “My drafts.” All your draft posts will be saved there.
Bonus Tip: Create Post Drafts Using Postfity
It can be frustrating to remember how to create draft posts on each website, even more so if you’re doing it one by one. Instead, you can simply use Postfity and create multiple post drafts across different social media platforms.
You can make draft posts for yourself on Postfity. Or, you can have your social media manager make drafts that you will have to approve. We’ll show you how to do both.
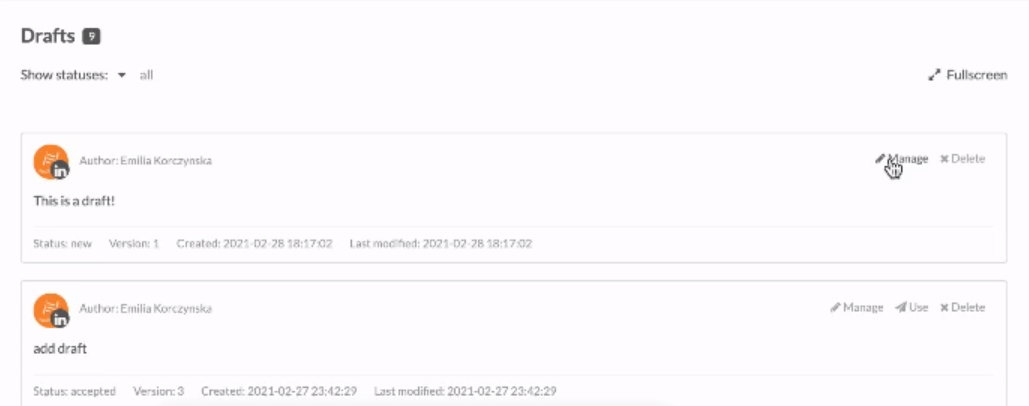
Post Drafts for Yourself
Here are the steps for making draft posts for yourself:
1. Go to Postfity’s panel page.
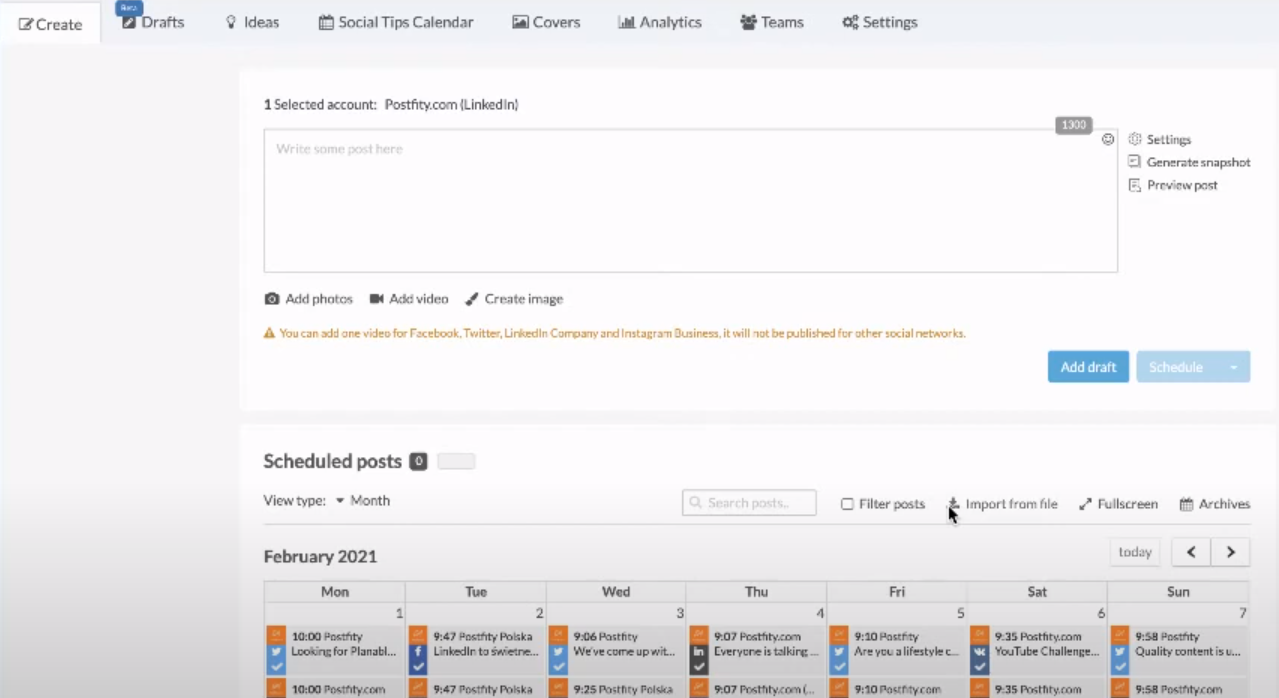
2. Write your post in the editing field.
3. Click on the “Add draft” button.
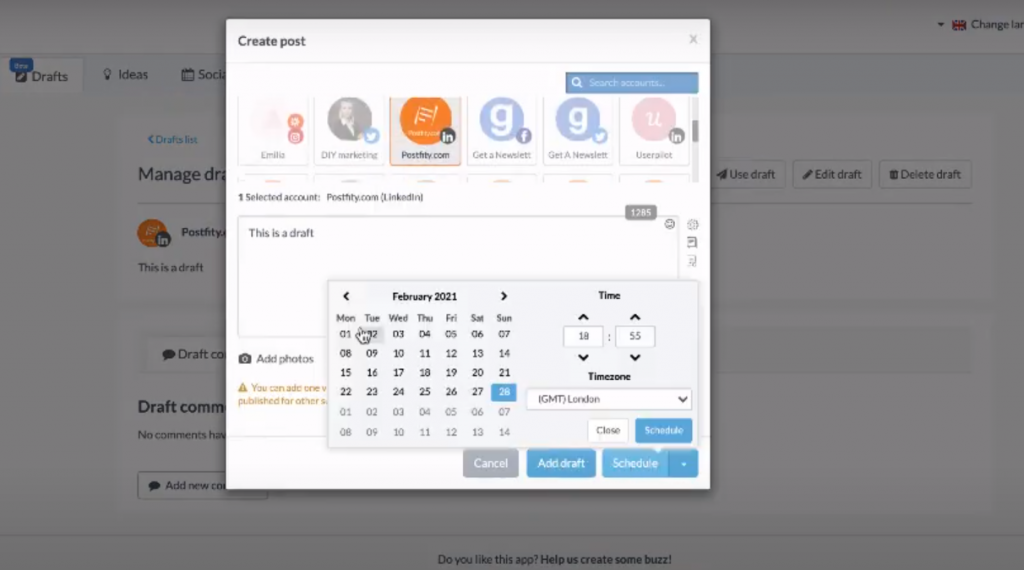
You can find your post draft on the “Drafts” tab. Here, you can click on “Complete” once you have finished editing the draft. Then, you can schedule the post to be posted on any social media platform of your choice.
Here’s a video tutorial for better understanding.
https://www.youtube.com/watch?v=ekiBqN5Al9U&t=6s
Post Drafts for Approval
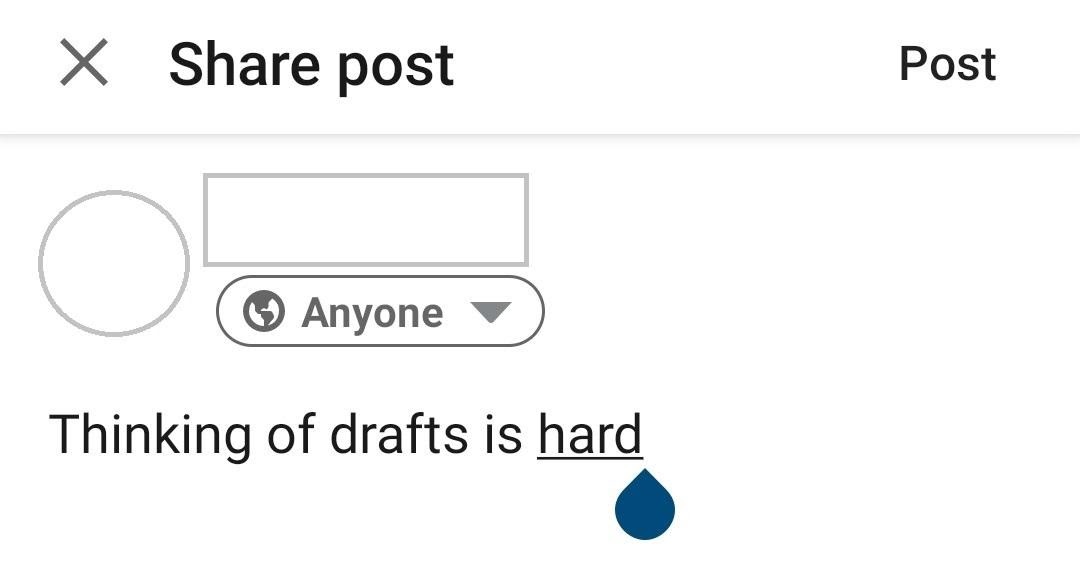
If you are a social media manager, you can add your drafts to be approved. To do this, follow these simple steps:
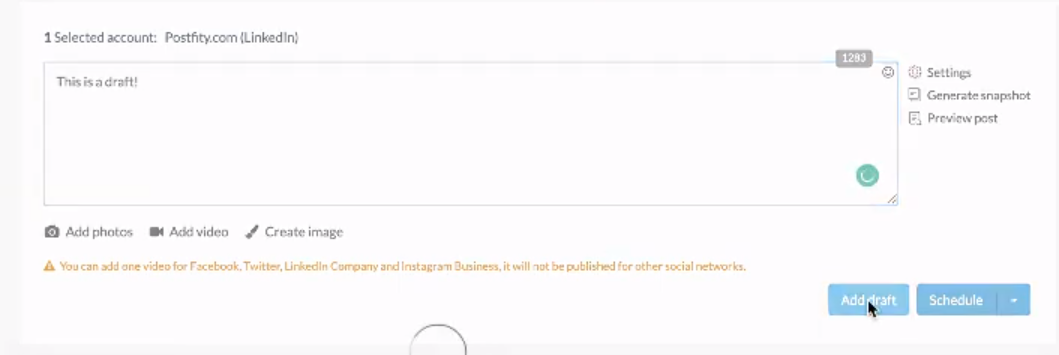
1. Go to Postify’s panel page.
2. Click on the “Drafts” tab.
3. Create your post in the editing field.
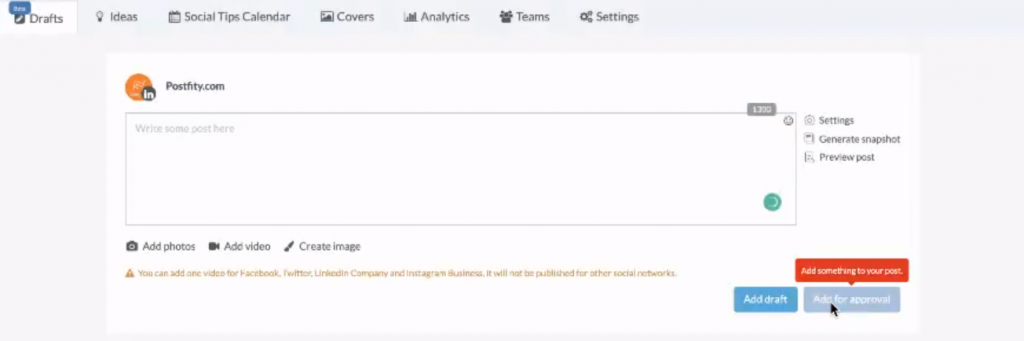
4. Click on “Add for approval.”
Now your manager or client will see the draft on their panel. After they have approved it, you can directly schedule the post to any of their social media accounts using the “Use draft” button.
Watch this video to understand the steps better!
https://www.youtube.com/watch?v=_jAzvFHg1rM
Final Words
With Postfity’s post draft feature, editing and planning your content is now easier than ever. Make sure you leverage this feature to make the most of your social media content. Sign up for our 30-day free trial today and see the wonders for yourself!


